How to install mods for Nomad
Prefered Installation
In-game, you can go to the "Mods" section in the Main Menu, and install mods through this, which will be installed and updated automatically. These mods are uploaded from Mod.io.
Manual Installation (Short Guide)
(Not Recommended)
- Download the mod from Nexus mods
- Extract the mod folder
- Plug your Quest 2 into your PC
- Drag and drop mod folder into
This PC\Quest 2\Internal shared storage\Android\data\com.Warpfrog.BladeAndSorcery\files\Mods
Manual Installation (Detailed Guide)
(Not Recommended)
Download the mod
Download your mod via Mod.io or Nexus Mods Nomad.
Extract the mod
Extract the mod folder out of the zip.
Downloading your mod will give you an archived file. You need to extract it first. You can use windows built in winzip to do this or use winrar or 7zip.
Windows double click to open
Windows right click > extract
7zip right click > extract
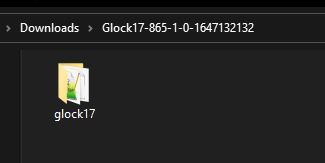
Double check you have the correct folder.
The mod folder you need to copy to the Quest 2 will have a manifest or manifest.json file inside it such as CoolMod/manifest.json.
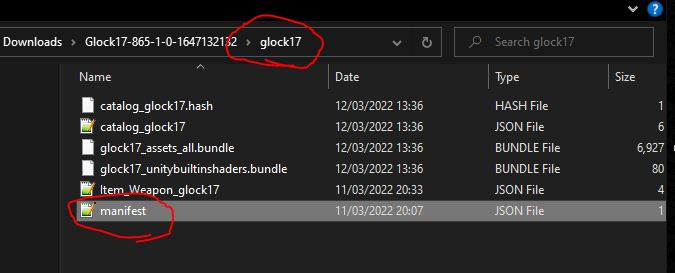
If you have a folder that looks like CoolMod-865-1-0-164277211 then that folder is incorrect, you want the CoolMod folder inside it, not the one with lots of numbers on it.
Install the Mod on the Quest 2 (Windows)
Power on the Quest 2
Switch it on by pressing the power button on the right side.
Plug the Quest 2 into the PC
Plug in the USB C cable into the Quest 2 and into your PC or Laptop you downloaded the mod onto.
The cable which comes with the Quest 2 will work perfectly.
You must use a cable that is for charging and data, if you use a charging only cable it won’t work.
Put on the Quest 2 headset
There may be a notification asking you to Allow access to data.
This will let your PC or Laptop access your Quest 2's files.
Select Allow
Do not click Deny or Don’t show again
If your Quest 2 is in Developer mode, you will not be able to access your Quest 2 internal storage this way. In Developer mode you can only access the internal storage over ADB. You will need to use Side Quest to transfer the files.
You must disable Developer mode, reboot your Quest 2 and plug in your cable again and it should prompt you to Allow access to data.

Take off your Quest 2 headset
You dont need to wear the headset for the next part.
Open the Quest 2 folder
On your PC or Laptop which you plugged the Quest 2 into, open File Explorer and go to This PC. Where you would normally see your hard drives.
You can do this many ways in Windows.
- Click Start, type
This PC. Click theThis PCicon. - Click Start, click the Documents file Icon on the left side of the start menu. Click
This PCon the left side of the window - On your keyboard, press the
Windows KeyANDEat the same time. ClickThis PCon the left side of the window
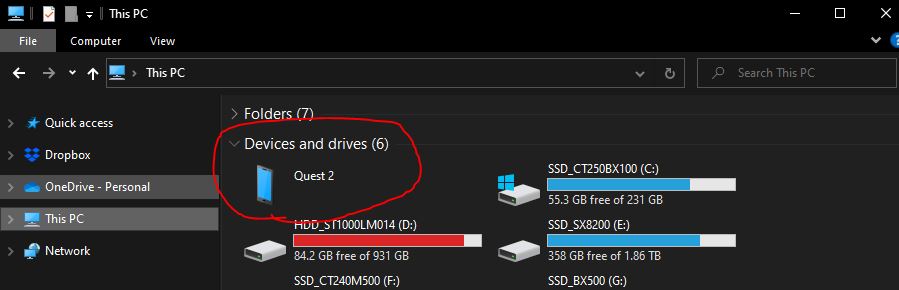
In This PC check you have the Quest 2 drive appearing.
Go to the Blade and Sorcery: Nomad mod folder
The folder should be here: This PC\Quest 2\Internal shared storage\Android\data\com.Warpfrog.BladeAndSorcery\files\Mods
There are two ways to get to the folder.
1. Navigate to the mod folder
Open up the Quest 2 drive by double clicking it.
Then you can go through each of the folders by double clicking on them:
Internal shared storageAndroiddatacom.Warpfrog.BladeAndSorceryfilesMods
Inside the mod folder is a Readme file. If you see that, you are in the right place.
2. Copy paste path to go to mod folder
You can get to the folder quickly by copying this path:
This PC\Quest 2\Internal shared storage\Android\data\com.Warpfrog.BladeAndSorcery\files\Mods
and pasting it into the address bar in the File explorer window and pressing enter or clicking the arrow
Copy the mod folder into your Blade and Sorcery: Nomad Mods folder
Get the mod folder we extracted earlier, ensuring its the one with the manifest file inside it.
Simply drag and drop it into the Nomad Mods folder.
Launch the game and your mod will be loaded.
You are done!