Creating custom armor
Custom armors is for advanced modders, as it require a good knowledge of rigging, skinning and 3D modeling characters in different softwares. The guide is a first draft about how to do armors, it may lack some important tips, in this case, feel free to contact a Warpfrog team member for more information.
Since U12, the SDK now contain a special version of Manikin, the system we use to manage modular characters.
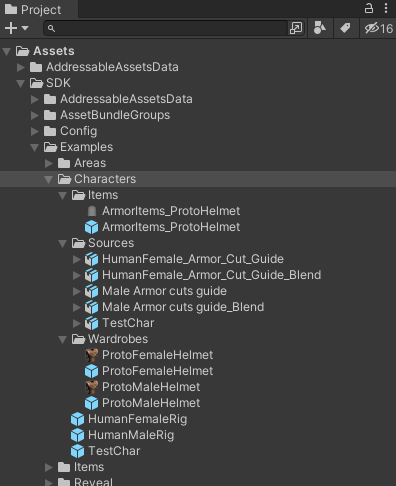
In the example folder in the SDK, you will find a custom helmet already configured, that serve as example of how to do a custom armor part.
Source fbx

The example folder contain a male and female fbx, that can be used as an example source to create new armor parts.
The guide will not cover how to create a compatible character model using a 3d software, so you will have to figure out how to do this.
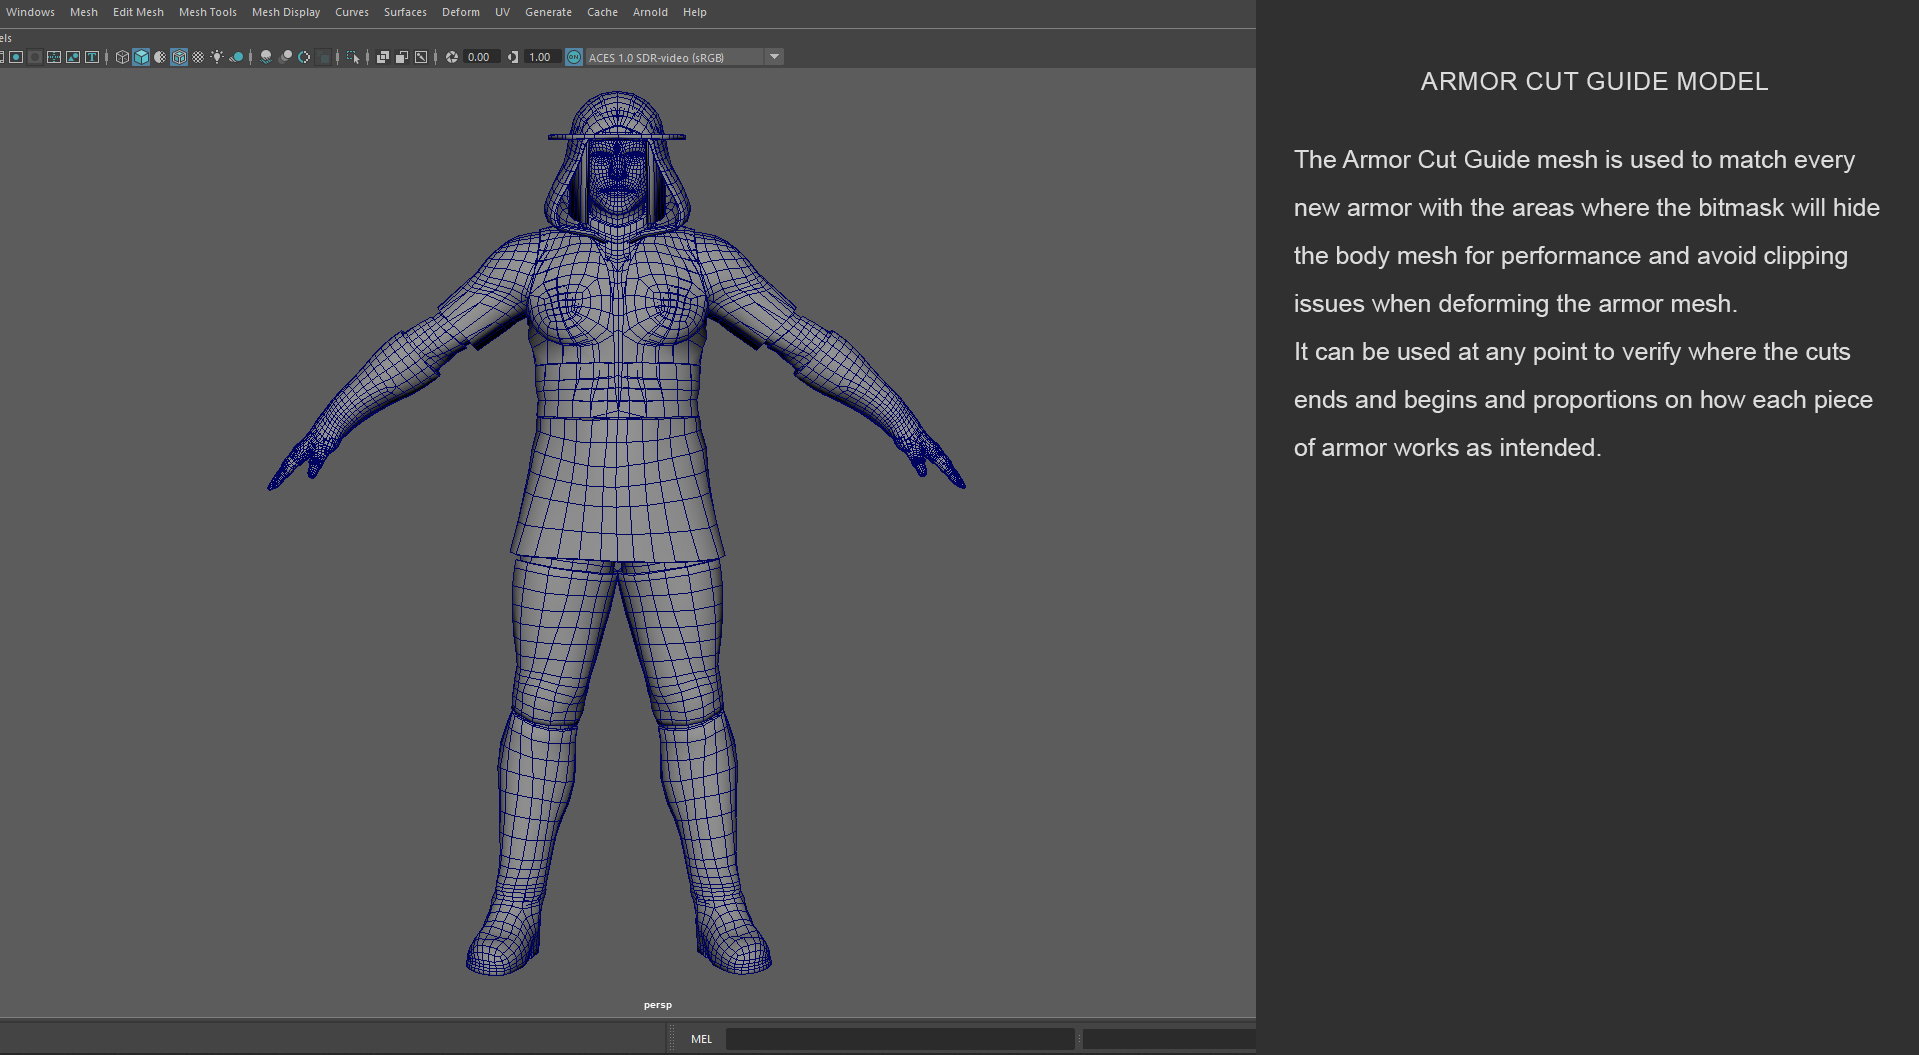
The fbx can be used as a cut guide, to help you to avoid clipping and adjust a bitmask used for vertex occlusion (an armor part can hide a part of the torso for example), and as reference for the current rig used in the game.
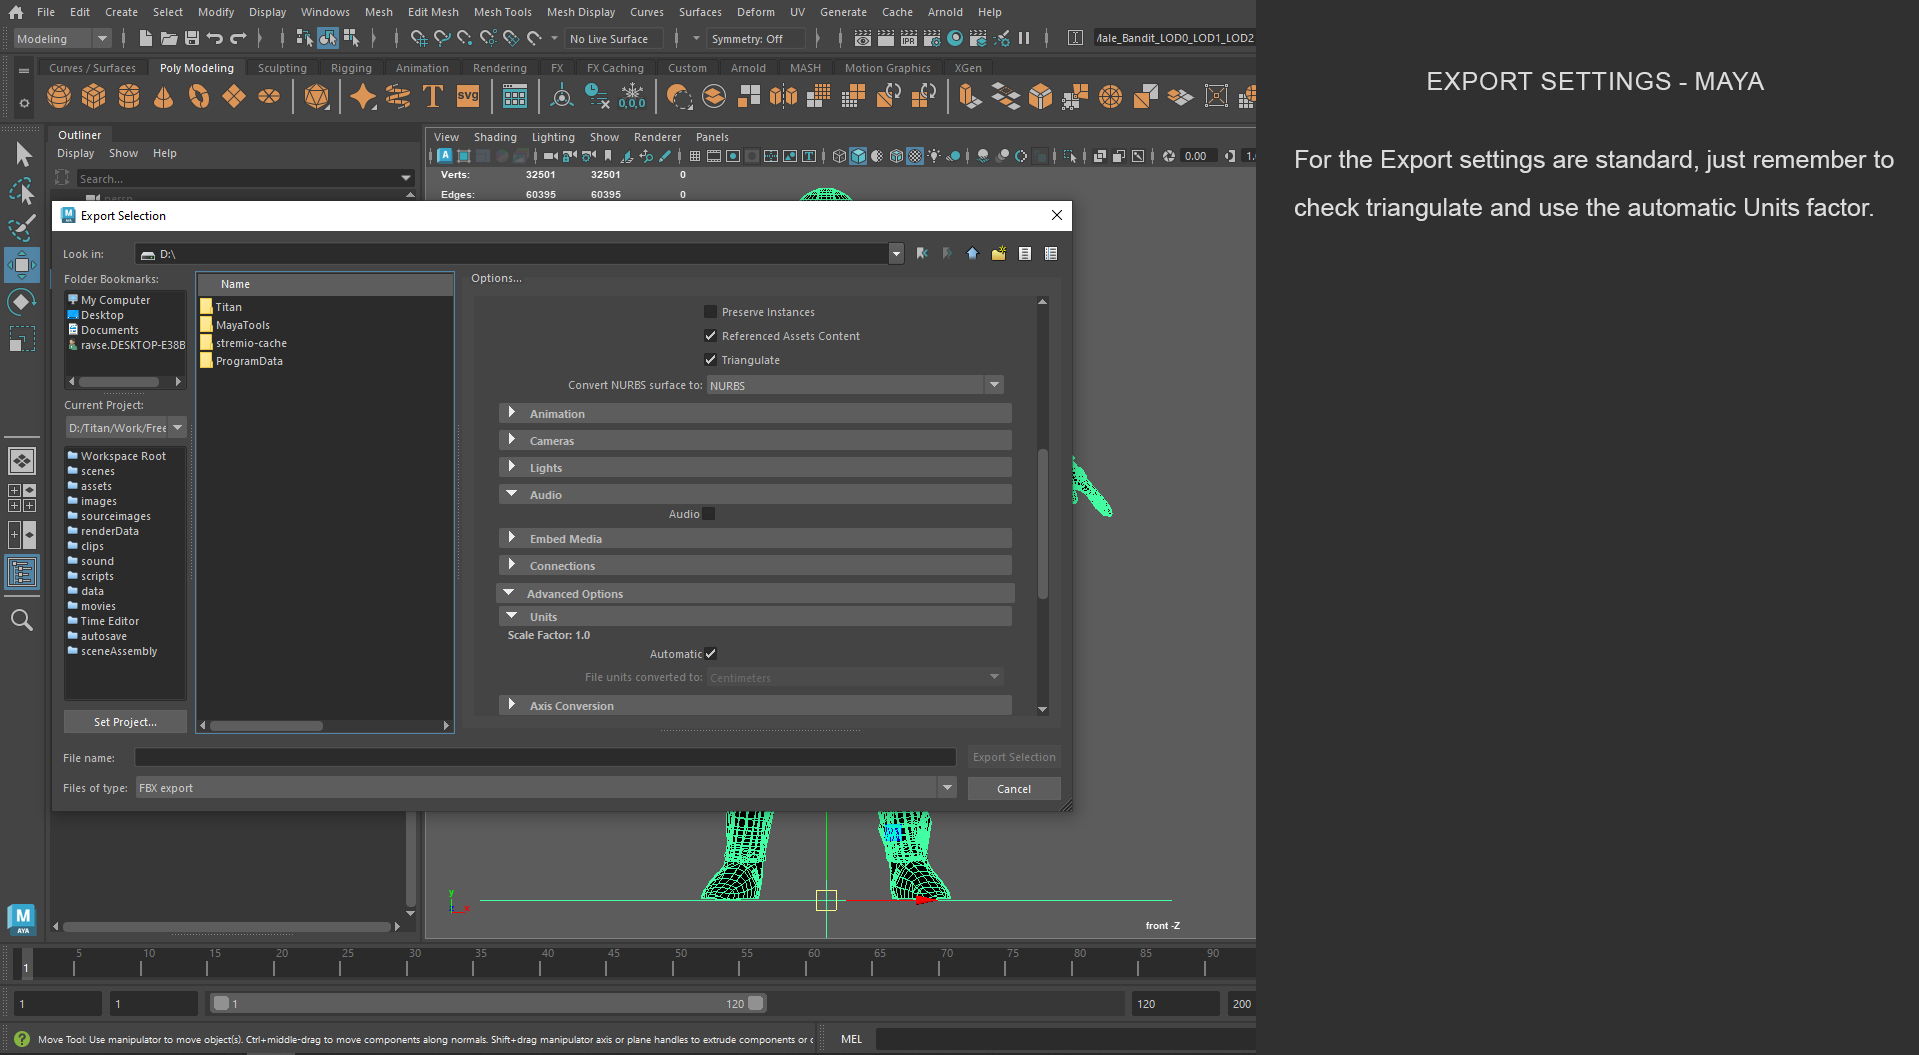 This is an export from Maya, Export Settings for Blender coming soon
The guide can’t focus on using a 3d modeling software, but we can at least share the export settings for Maya that is used by our character artist :p
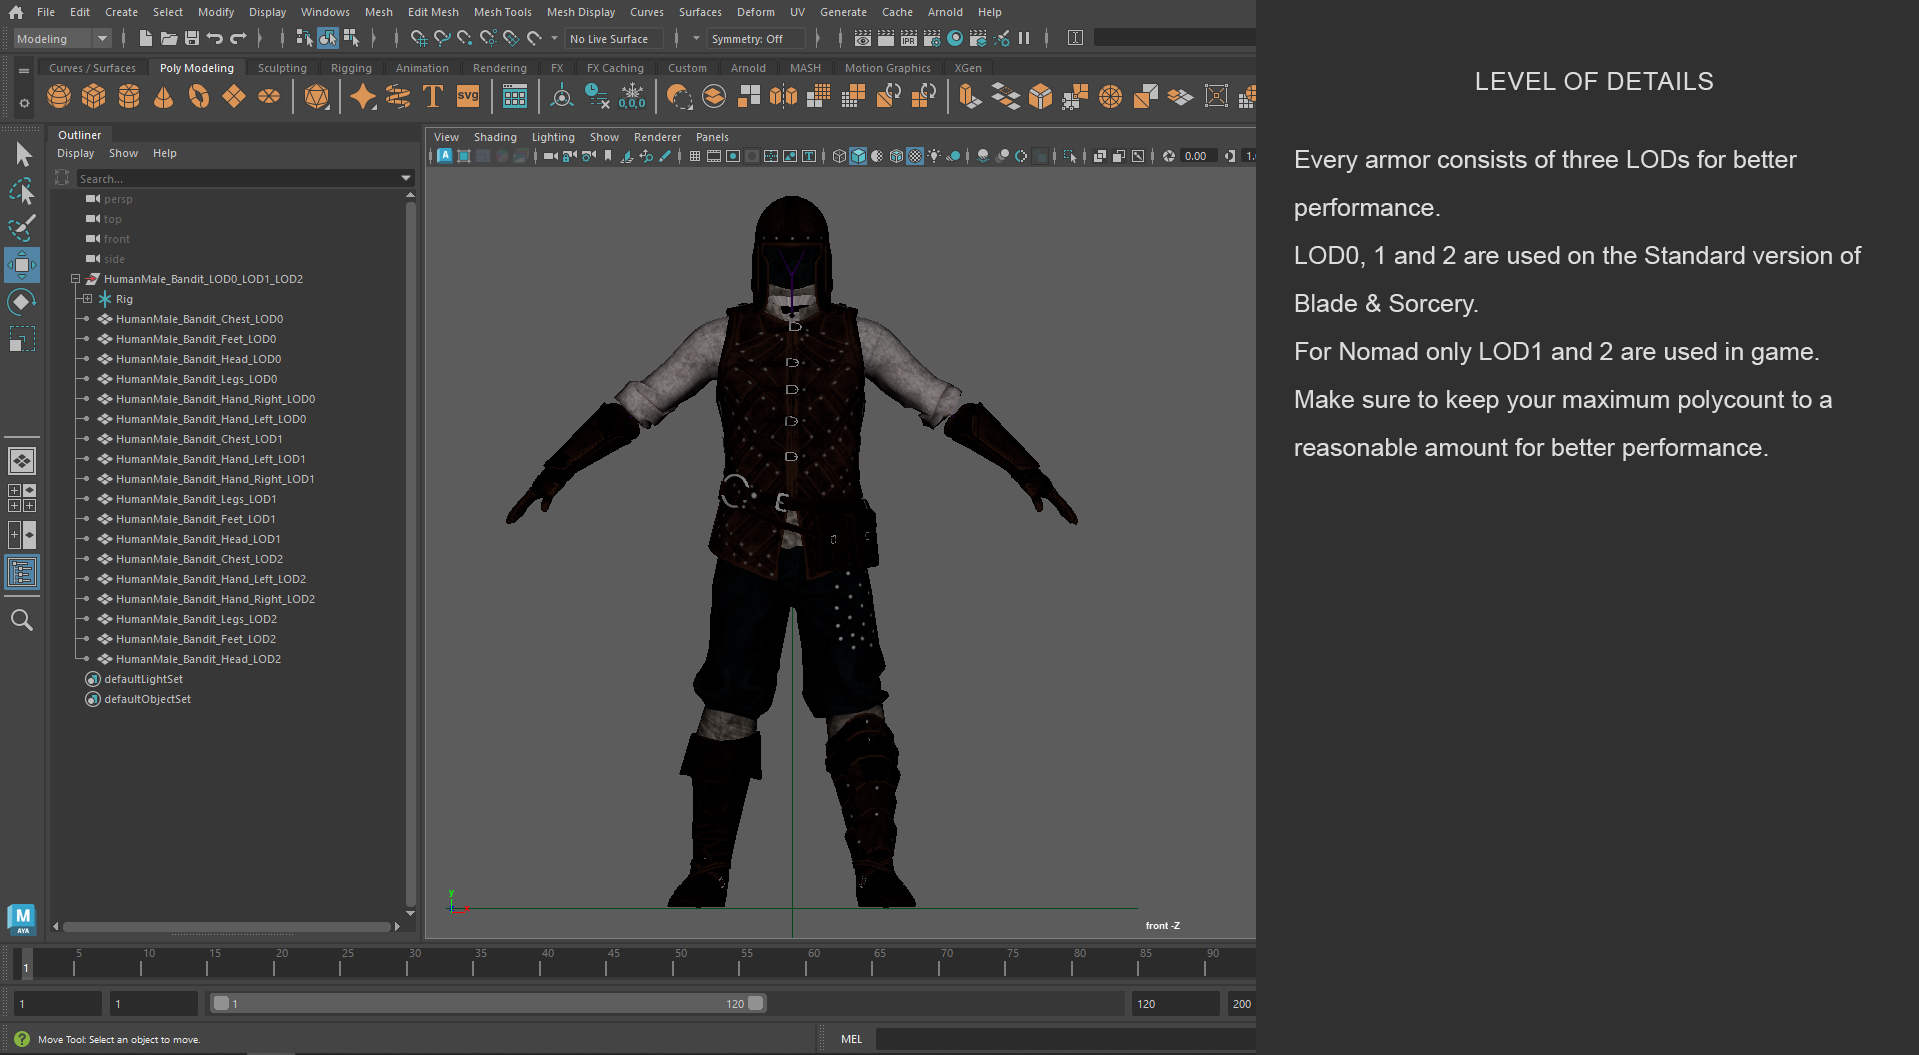
When we export the Rig, it cannot be different from a scale of 1 before being exported from the modeling software.
Creating parts
A part is a prefab that contain all skinned mesh renderers and components that will be added on the character in game
To create a new armor part, drag and drop the armor fbx into the scene, select one (or multiple) skinned mesh renderer(s), go to Gameobject → Manikin → Create new part then set the path where the part(s) should be saved.
Once the part is created, drag and drop the asset in an addressable group of your choice, and define an address to it.
Optionally, you can open the prefab and do the following:
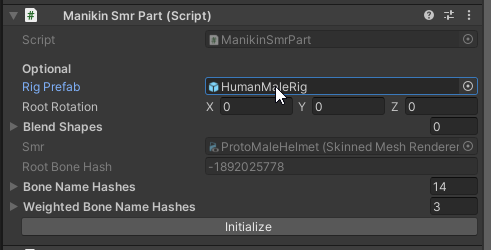
Assign a rig on the manikin smr part to be able to view the mesh in prefab mode:
Add the reveal decal component on all skinned mesh renderers (including all lods) so reveal (decals) works
Character material should use the Shader ThunderRoad/LitMoss, it’s necessary for reveal (decal) and other systems.
Try to optimize mask resolution depending on part size and LOD. For example sandals may need a lower resolution while a chestplate need an higher one, and LOD3 probably could even have lower resolution, if even no reveal at all. 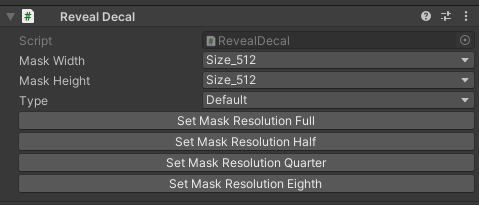
Try to optimize mask resolution depending on part size and LOD. For example sandals may need a lower resolution while a chestplate need an higher one, and LOD3 probably could even have lower resolution, if even no reveal at all.
Physic material / IDMAP
Like items and environments colliders, armors can also use a physic material. To set a different material than flesh (default on characters), you need to add the mesh part component to the root of the part prefab.

As characters only use simple colliders, the game uses a custom system to determine the physics material on the collision point. This work by raycasting the low poly mesh to get a UV coordinate that can be then used to retrieve a specific color on an IDMap.
ID map of the chest part of the gladiator armor 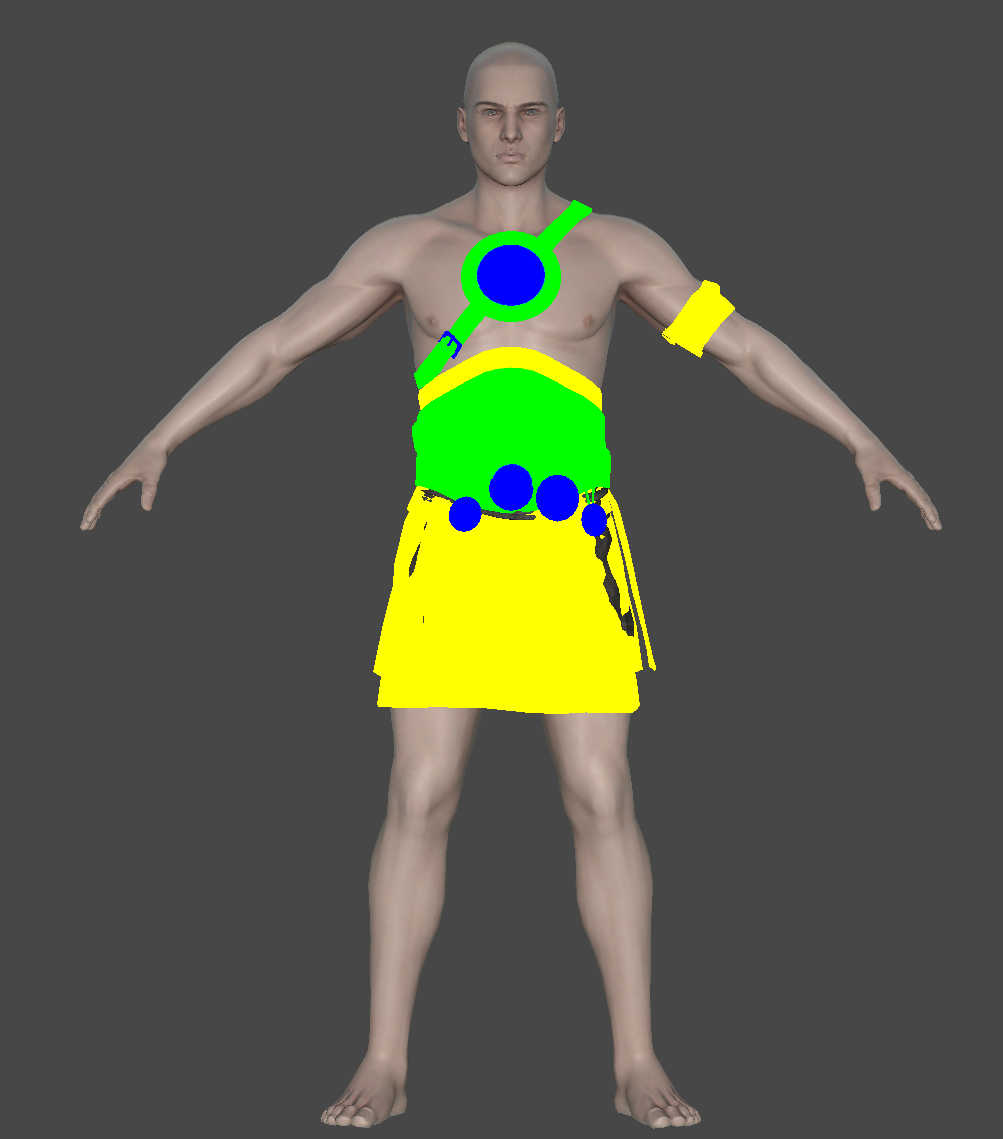
Mesh part component:
| Field | Description |
|---|---|
| Skinned Mesh Renderer | This references the mesh that you want the game to use to create collisions with. It is recommended to use the last LOD available so that the collission is less expensive. It will use this mesh to calculate the ID Map color. |
| Default Physic Material | This informs the “Default Material” that the game will use for the basic collission. If the part does not have an ID map, but is fully plate, you can reference the plate physics material. If it has an ID map, it is recommended to use the “Flesh” physics material. |
| ID Map | Insert the texture here that you wish to create an ID Array with. Ensure that this is empty before you export your armor. |
| ID Map Array | This is created my pressing the “Convert Id Map to Id Map Array” button when an ID map has been placed in the “Id Map” field. This array is used for cheaper physics materials calculations. |
| Scale | The scale section scales the ID map down by this multiplier. The recommended amount is 4. |
The SDK contains textures of each material type and an IdMapTest shader to visualize your idmap on your armor. 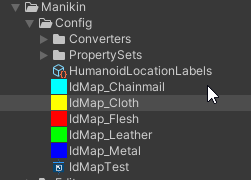
The SDK contains textures of each material type and an IdMapTest shader to visualize your idmap on your armor
Creating wardrobe
A wardrobe is a scriptable object that contain the data about how to render the part on the character (slot, channel, layers, etc…)
To create a new wardrobe, right click on the project folder you want and select Create → Manikin → Wardrobe Data
Once the wardrobe is created, drag and drop the asset in an addressable group of your choice, and define an address to it with sufficient labels.
Then reference the part you created in asset Prefab, set the editor location label, and define the slot (channel), and layer that will be used for this part.
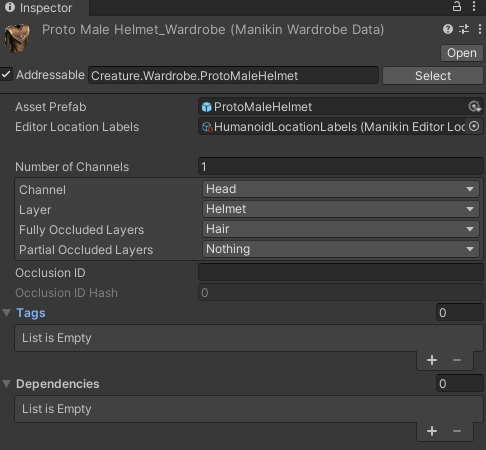
You can optionally fully or partially occlude a layer (in the above example, we hide the hair as it’s an helmet)
How to create a part and a wardrobe, full video below:
Creating a world item and configuring json
Armor need a physical item, so armor can be manipulated and dropped anywhere. For this, you need to create a new item. The creation of an item is not covered on this tutorial, so we will focus on the specifics for an armor. For an example of an already configured armor item, you can check ArmorItems_ProtoHelmet prefab in the SDK.
In the case the male and female armor have a different look for armor items, you will need to add on the prefab the component: ClothingGenderSwitcher

On the item json, add the module ItemModuleWardrobe, and define two wardrobes (male and female), with the address you set for your wardrobe:
"modules": [
{
	"$type": "ThunderRoad.ItemModuleWardrobe, ThunderRoad",
	"category": "Apparel",
	"castShadows": "PlayerAndNPC",
	"wardrobes": [
	{
		"$type": "ThunderRoad.ItemModuleWardrobe+CreatureWardrobe, ThunderRoad",
		"creatureName": "HumanMale",
		"wardrobeDataAddress": "Creature.Wardrobe.ProtoMaleHelmet"
	},
	{
	"$type": "ThunderRoad.ItemModuleWardrobe+CreatureWardrobe, ThunderRoad",
	"creatureName": "HumanFemale",
	"wardrobeDataAddress": "Creature.Wardrobe.ProtoFemaleHelmet"
	}
	],
	"isMetal": false
}
],
The JSON used for the armor MUST start with Wardrobe_. JSONS that start with anything other than this may cause issues. It is recommended to copy a wardrobe JSON over any other JSON if you make a new armor part.
If needed, a json example is available in the SDK in the proto json folder: [SDK Path]\BuildStaging\Catalogs\default\proto\Items\Item_Wardrobe_ApparelProtoHelmet.json
The latest stage then will be to create the asset bundles (see Using SDK to create asset bundles), and copy over the armor item json in your mod folder. Once in-game, the new armor part(s) should automatically show on the item spawners.