Creating Custom Levels
This guide will show how to create your own custom level. This guide will show both the necessities of components needed, as well as components you are able to use to enhance your levels.
Starting Out
First, you will want to install the SDK (recommended using GitHub Desktop) on the Unity version 2021.3.38f1 (recommend installing on Unity Hub).
Once complete, inside Unity, create a folder inside your project and in that folder, Right Click > Create > Scene. You can select an appropriate template, a recommended one would be with the directioanl light.
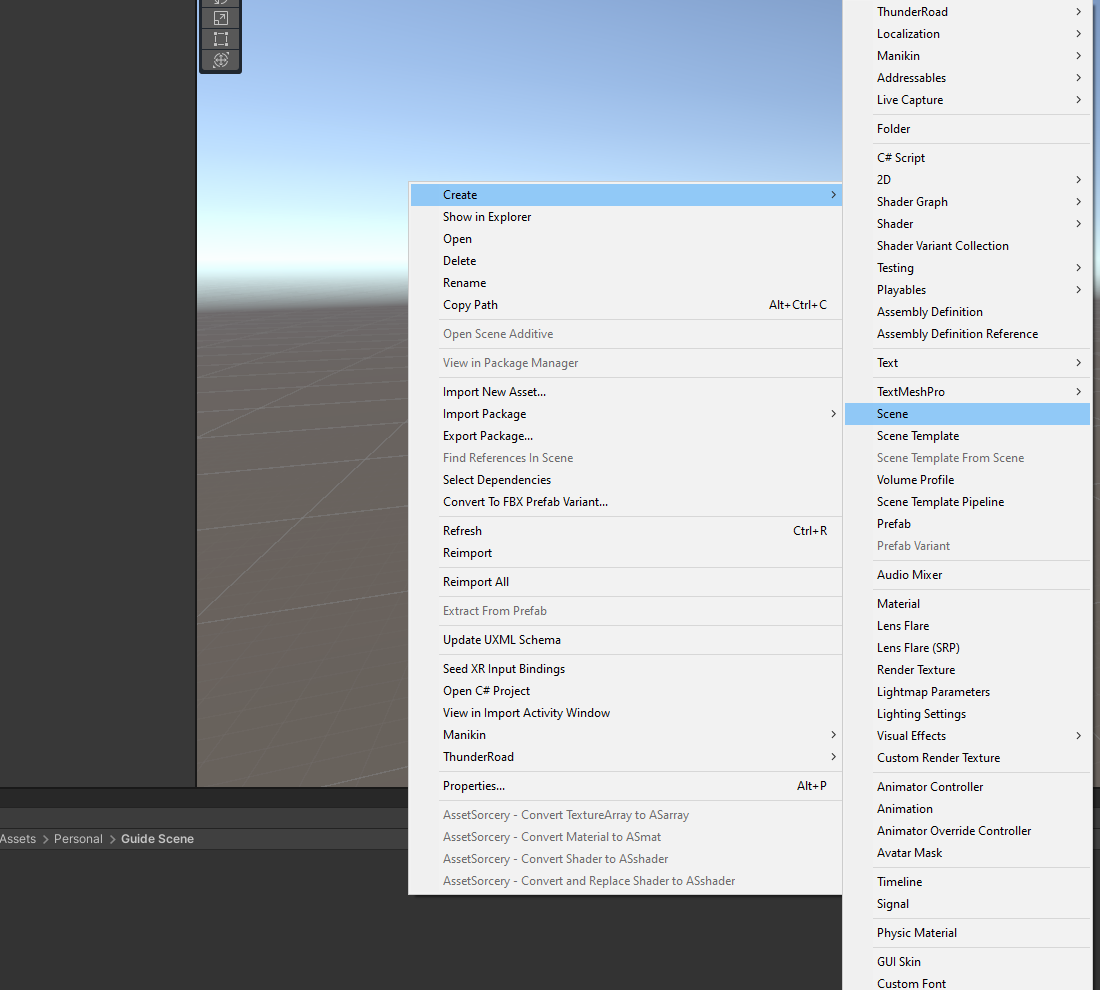
Once complete, in the scene, delete any sort of Camera automatically added to the scene. Any cameras in the scene will conflict with the player camera, and cause a plethora of issues when you’re in game.
The next step is to add a GameObject, call it “Level” and add the Level component. Create a child under that GameObject and call it “PlayerSpawener”. Add the PlayerSpawner in that object.

Once complete, you can now build your level up, adding meshes and objects to your will.
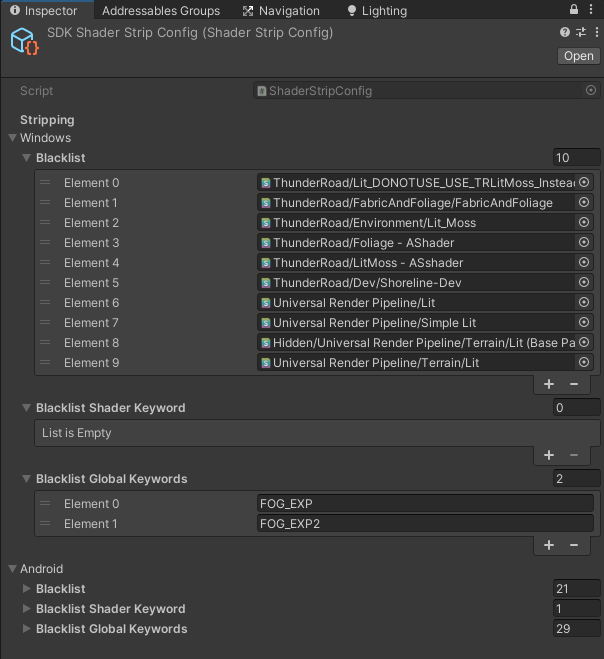
You can use the test character under Assets/SDK/Examples/Characters for scale references.
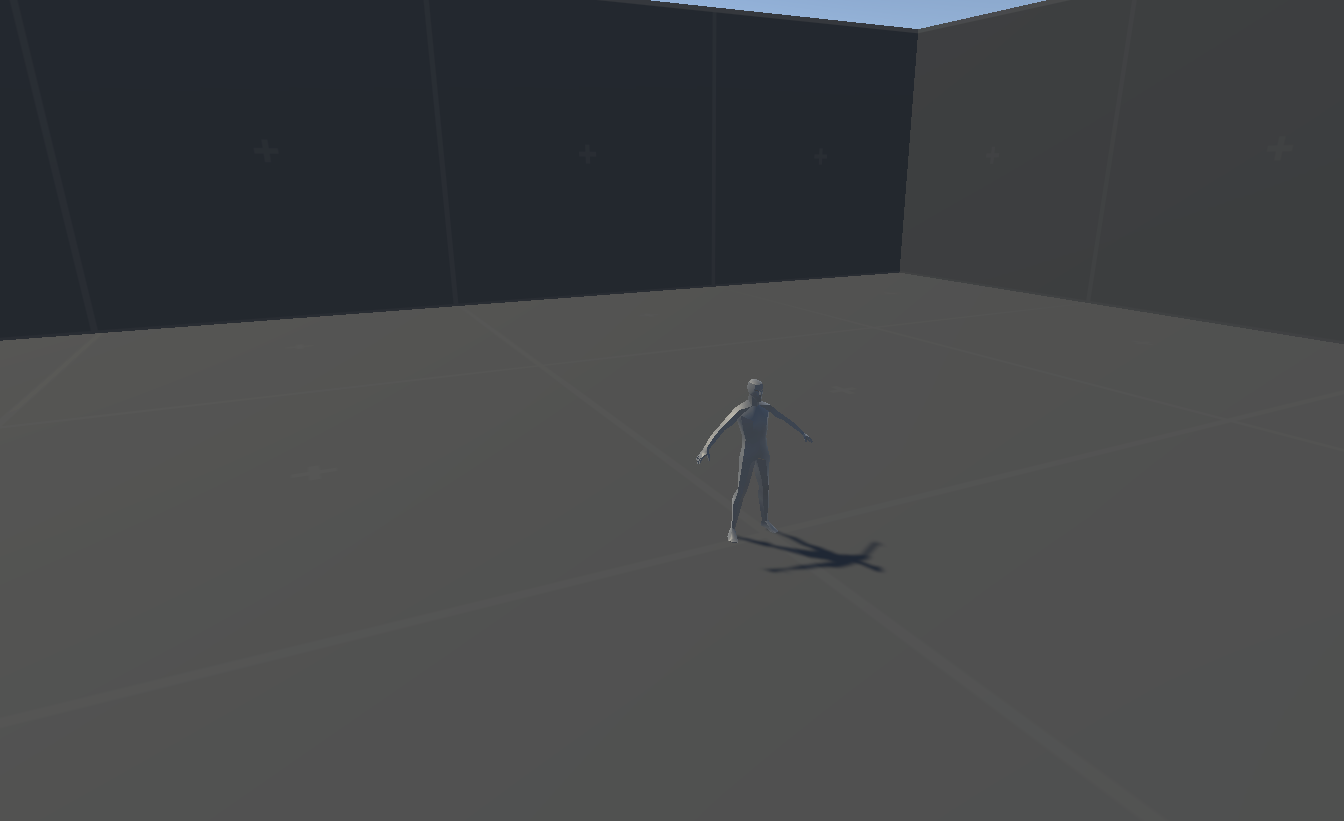
Once you complete your level, you must ensure that all normal meshes are compatible with VR and not stripped with Warpfrog’s shader stripping process. The most recommended shader you can use is ThunderRoad/ASshader - LitMoss for normal meshes and ThunderRoad/ASshader - Foliage for foliage and moving fabric. If you have used Unity Terrain, the default shader will be URP/TerrainLit, however this is stripped by our Shader Strip tool. To change this, search for SDKShaderStripConfig asset file, and under it, remove the reference to that particular shader under the blacklist. Ensure you do not remove any others, even if LitMoss is under it. This blacklist is to ensure that mod build times are fast, and do not compile shader varients if the shader already exists in game.
DO NOT use the “Dev” varients of the LitMoss/Foliage shader. This is a master shader only, you should only use the base LitMoss/Foliage shader.
Once your level is created, you will want to place your Level/PlayerSpawner somewhere near the floor of your level. The player root (feet) will spawn at this gameobject, so you want to make sure it is not too high when the player loads in, as they could take fall damage. Add colliders to your assets in the scene as well, recommended on prefabs so it changes all of those meshes in one easy push. Apply PhysicsMaterials to those colliders, setting them where appropriate (e.g. Tiles or Walls could be made of “Wood” or “Stone”).
Leather and Plate physics materials is for armor only. If used for levels, blood will spurt out of the object when hit.
Spawning Enemies and Items
Once your level is meshed up and ready, we will want to set up the level with neccessary components that allow you to spawn items and enemies in your level.
The SDK contains assets that allows you to, under the SDK “Examples” folder. All under Assets/SDK/Examples/Prefabs, you will see the main objects used for wave spawners. Add the “WaveBook” and the “ItemBook” to your scene (variations with the alter also exist here). For your Item Book, you can move the gameObject “Spawn Item Position” (Under the UI_ItemSpawner) someplace responsible for spawning items.
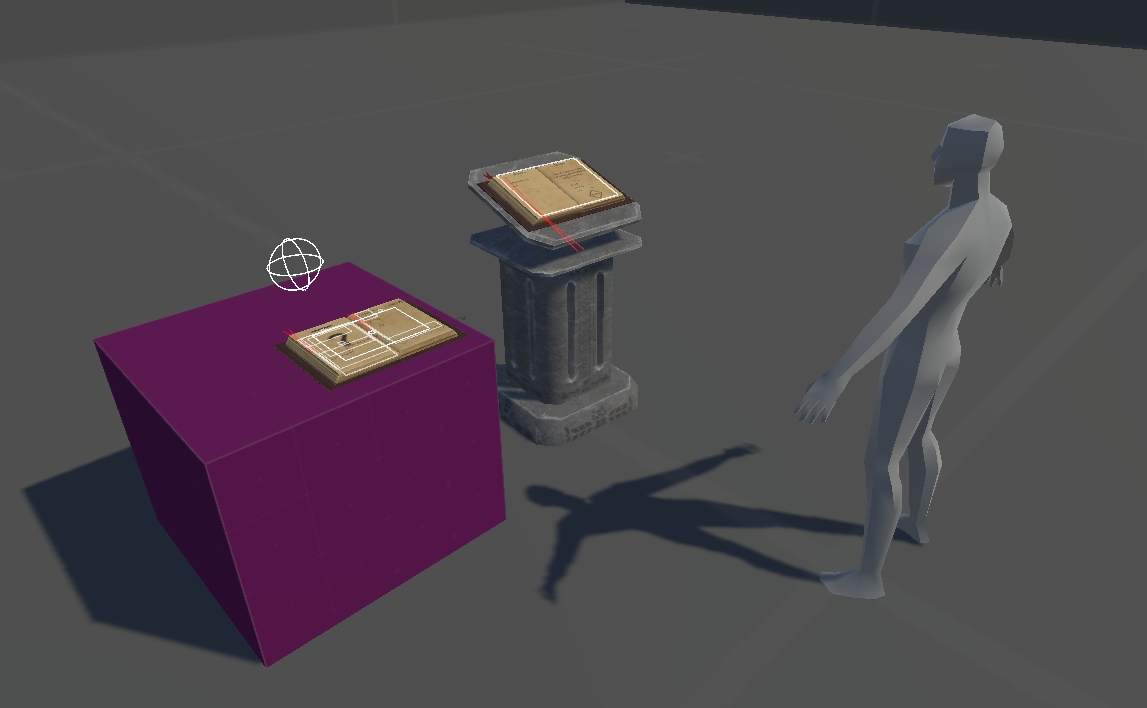
Next step is to create a WaveSpawner. Add another gameobject, which can be under the WaveBook/Altar, and name it “WaveSpawner”, and under it, add the WaveSpawner component.
Next, under the WaveSpawner, add empty GameObjects and call them “SpawnPoints”. It is recommended to create a minimum of 3 spawnpoints so that enough enemies can spawn at a time. Place them at the floor, similar to the PlayerSpawner, so the NPCs do not fall when spawned. For the rotation of these objects, the blue arrow points forward, so NPCs face this way when spawned.
If, when you rotate your objects, the axis does not move with your rotation, ensure that your “Toggle Tool Handle Rotation” at the top of Unity is set to “Pivot” instead of “Global”.
When created, place those gameObjects under the “Spawns” section of the WaveSpawner (You can press the Lock at the corner of the inspector so you can move the spawners to the Spawns. Make sure to unlock afterwards).
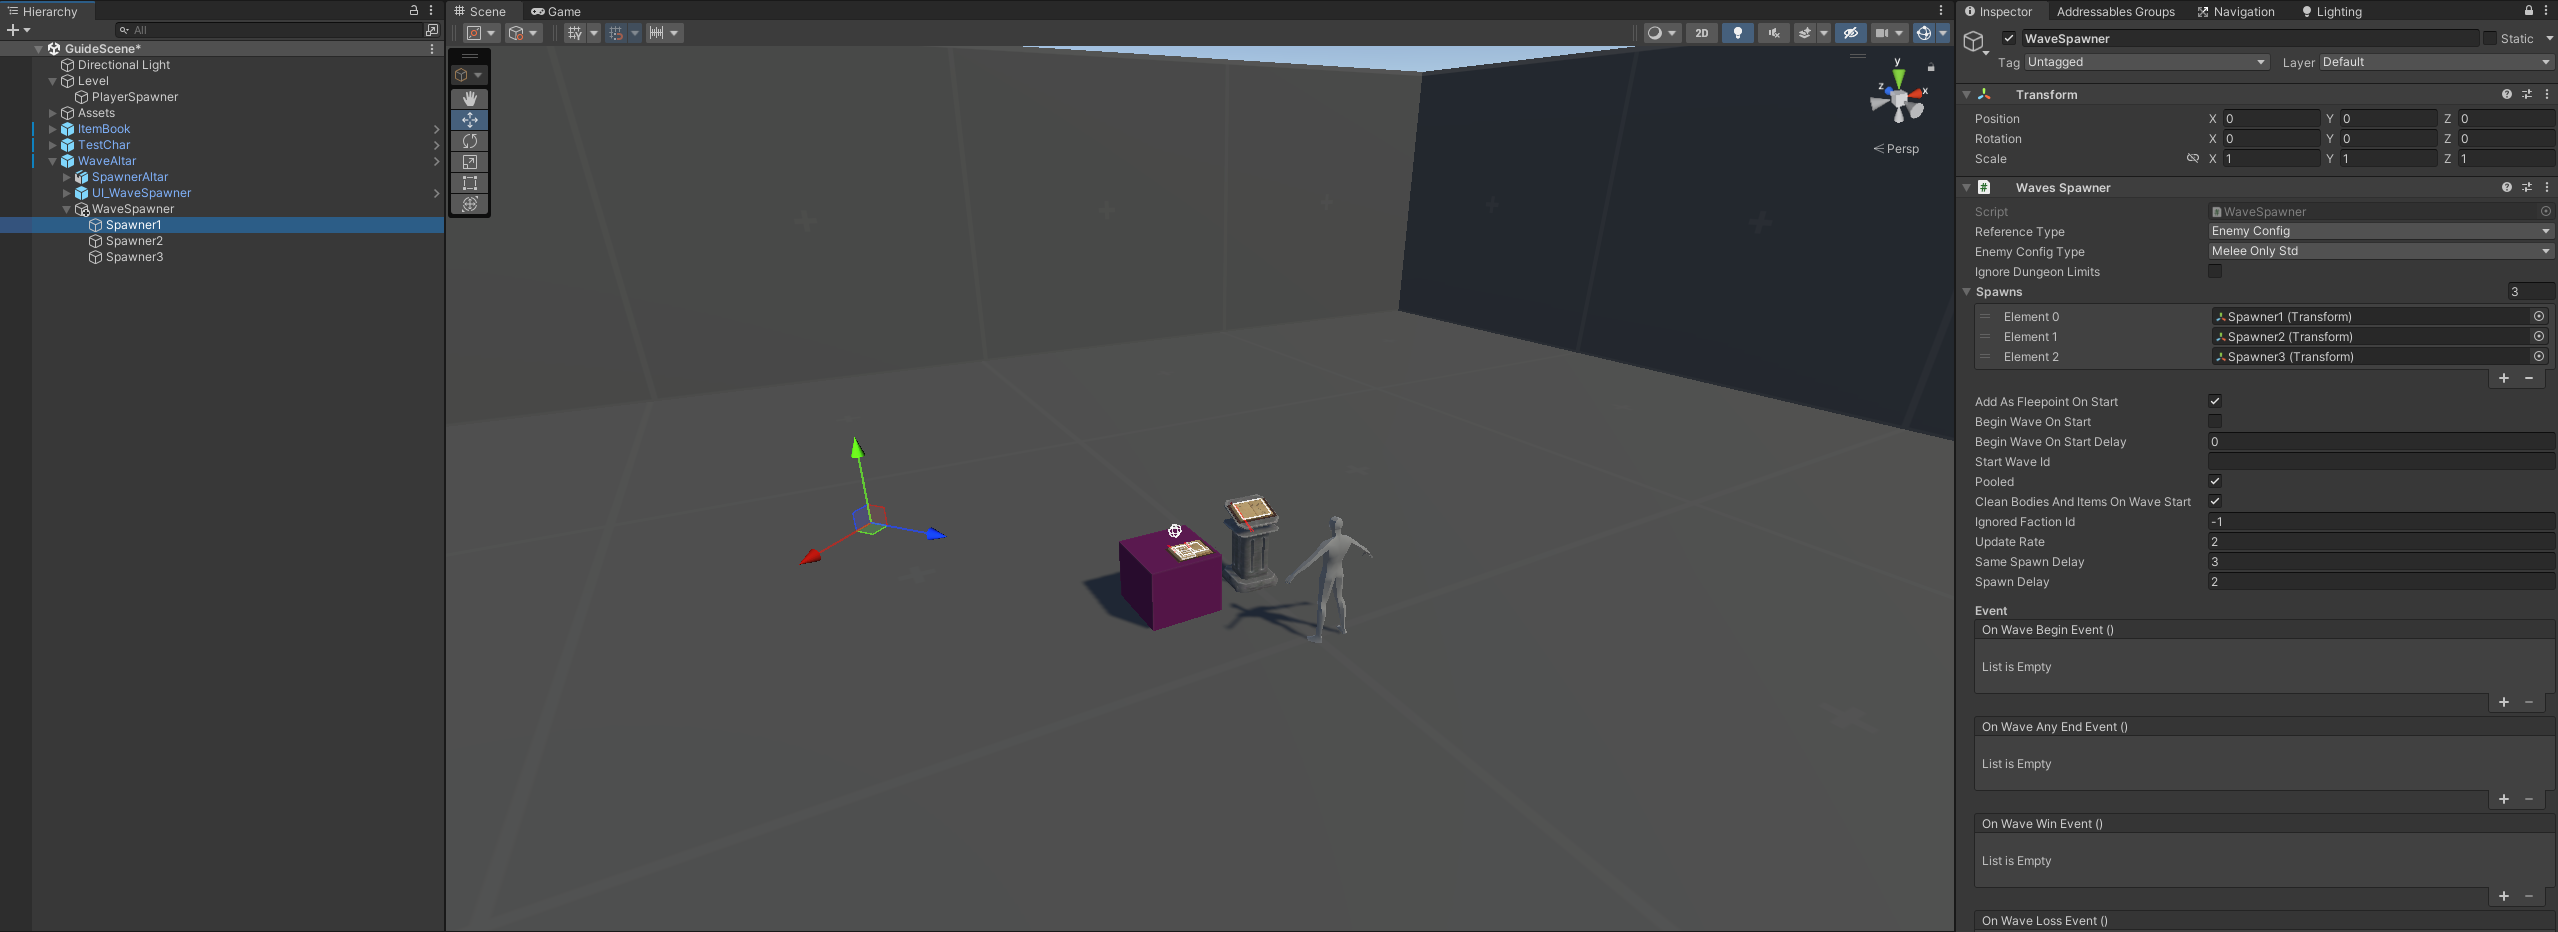
Then, once completed, locate UI_WaveSpawner under your WaveBook/Altar, and move the WaveSpawner under the “Wave Spawner” section of the UI Wave Spawner component.
The “ID” part of the UI Wave Spawner is not level ID, but a “Waves location” ID, where under the Wave JSON, the “WaveSelectors” will use this ID to be able to show the wave. If you want the normal default waves, you can just leave the ID on the UI Wave Spawner set to “Arena”.
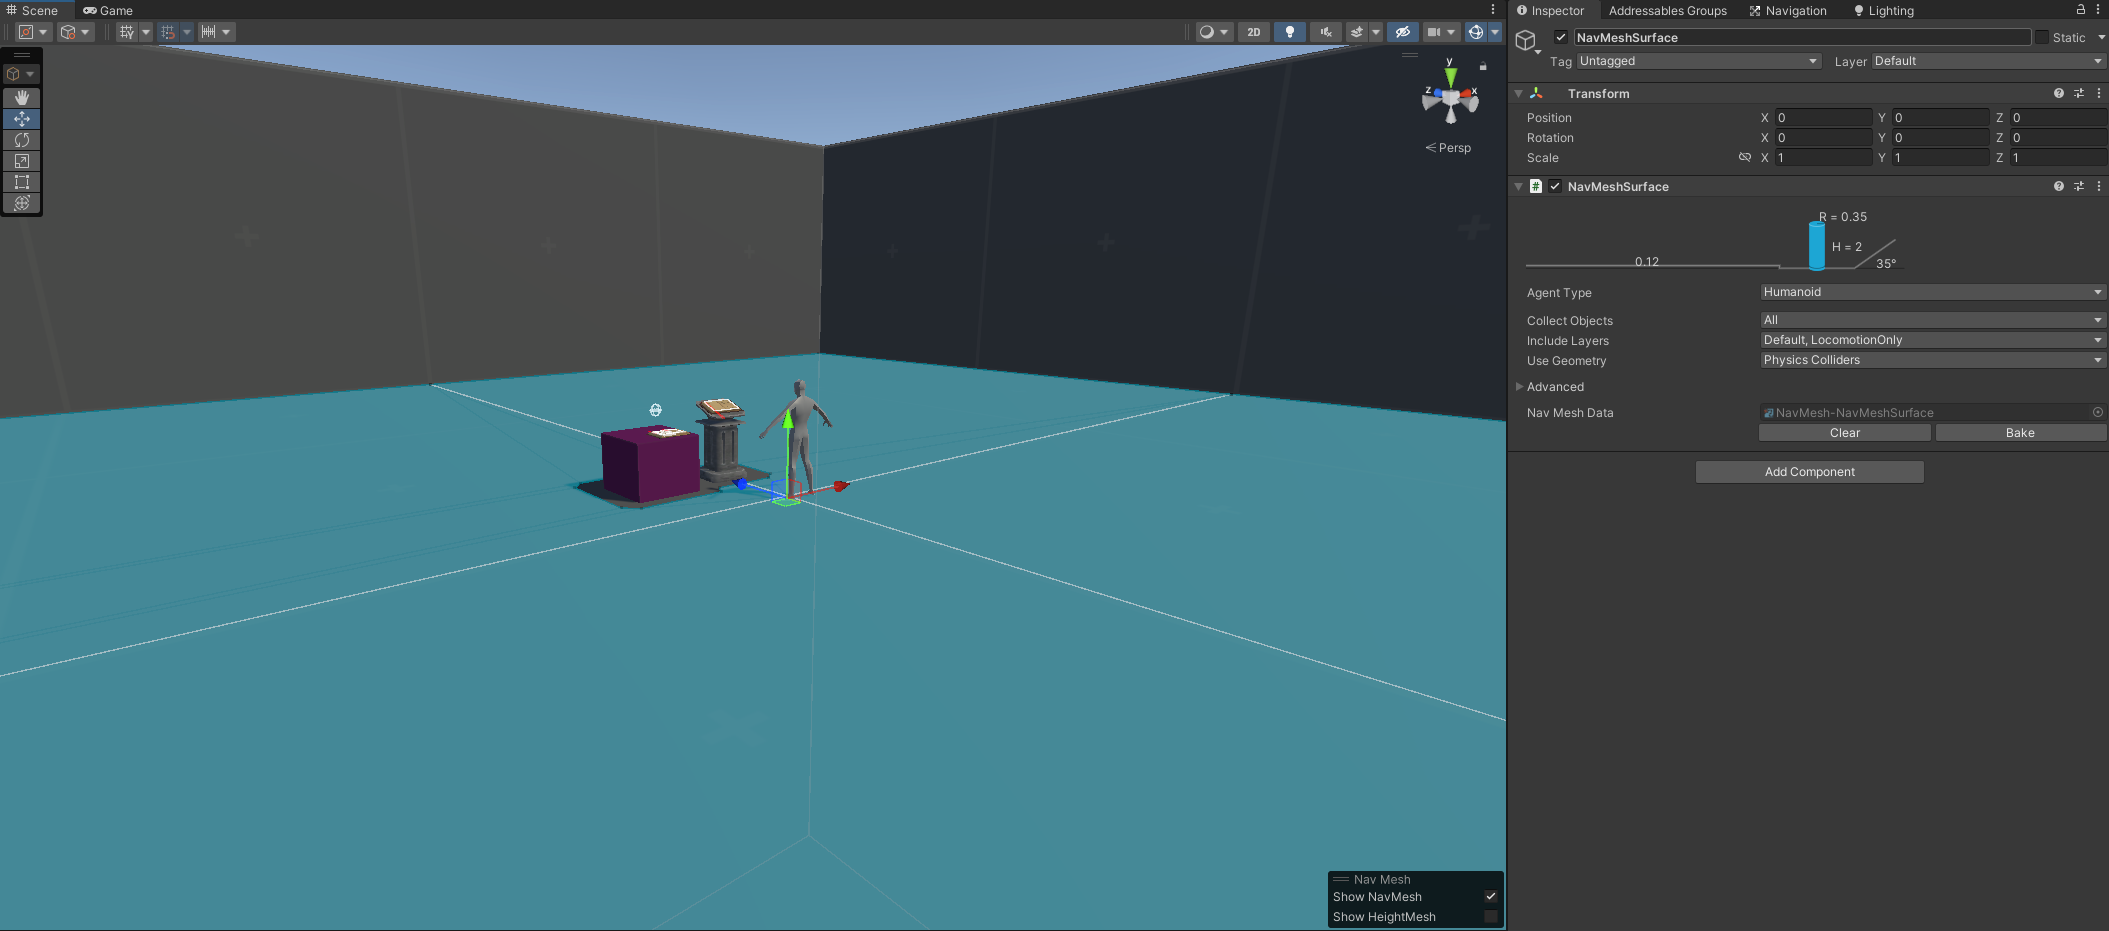
Once complete, you will want to make sure that enemies can move. Ensure that your objects/floor is set to “Static”, and locate to Window > AI > Navigation to bake your navigation mesh there, or add a gameObject in the scene, and add the “NavMeshSurface” there. Under the NavMeshSurface, set the “Include Layers” to Default and LocomotionOnly, and set the UseGeometry to “Physics Colliders”. This is for more accurate navigation using the colliders for navigation rather than the meshes. You will be able to see a blue “Mesh” cover your objects of which NPCs can walk across, if gizmos are enabled.
You can now go to Window > Rendering > Lighting and adjust your lighting settings. Create a new Lighting Settings, and adjust the settings where responsible.
Baking lighting is a resource-hogging process, and can cause a long time depending on your assets and/or your system specs. The stronger your PC, the faster baking will be. Baking your levels may lag your PC, and may cause overheating if your PC is not properly cooled. Note that if your PC is not very powerful, and your level is detailed, some functions may not work properly, and baking may fail altogether.
For faster results, you can set the lightmapper to “Progressive GPU”. The recommended Lighting mode is Shadowmask/Subtractive for PC, and Subtractive for Android. See Unity’s Lighting Documentation for more information on Unity Lighting.
Building your Level
Now, your scene should be complete and ready to test in Blade and Sorcery. Open the Addressable Groups (You can find this ThunderRoad(SDK)/Addressables Groups) and right click in an empty space. Click Create New Group > Packed Assets and name it something responsible. Move the level under this packed asset, and name it something unique (For example, for best practises, you can name it something like MyName.Level.MyTestLevel). Add the “Windows” or “Android” Label (depending on which you are exporting the level as).

Once done, go to ThunderRoad (SDK) > Asset Bundle Builder. Click the “Create New Asset Group” button, and click on the “NewMod” Asset bundle group that was created. Name it something responsible, and look at it in the inspector. Edit the “Folder Name” to what you want to name your mod, and adjust the “Mod Manifest” fields. If you tick “Export Mod Manifest”, it will create a manifest.json which will allow your mod to be detected by the game. Next, add your Addressable asset group under the “Addressable Asset Groups” list.
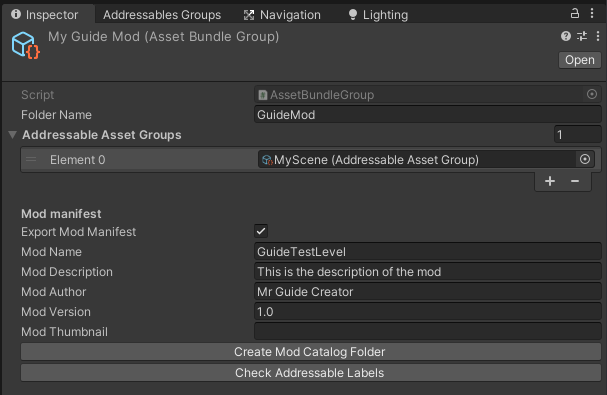
“Mod Thumbnail” is optional. This is used to reference an image that can be used as a thumbnail for your mod if manually installed, i.e not installed via Mod.io.
Now, go back to your Asset Bundle Builder. Tick the boxes by your mod asset group, as well as the export checkbox for it. Go to the “Game executable path” and set it to the location of the Blade and Sorcery .exe file. Now, with everything set correctly, click “Build asset bundle group(s) selected”.
When you build your asset, this may take a while depending on your level. This can be resource-hogging, and your PC may lag a bit when building. If you use custom/non-stripped shaders, this will take considerably longer to export, which is why it is recommended to use ASshader - LitMoss and ASshader - Foliage shaders.
Once your mod has been exported once, a cache will be generated to make it faster next time the mod is exported. You can clear this cache by clicking “Clear build cache” when you export next, if the cache caused problems such as shader issues.
The final step, once your level is built, is to add a level.json. In your SDK directory, go to BuildStaging/Catelogs/Default, you will find all the JSONs here. Go to the “Levels” folder, and grab Level_Arenaand put it in your mod folder. You should see the mod folder when you have exported, it will be in the Blade and Sorcery directory > BladeAndSorcery_Data > StreamingAssets > Mods. Copy the Arena level JSON to your mod folder and rename the Level_Arena to something responsible, ensuring that it begins with Level_, and start to edit it with a text editor program of your choosing.
Inside the JSON, edit the “ID” to something unique, as well as changing the “name” to the name of your map, and set the description accordingly. Next, change the “sceneAddress” to the name of the scene that you put in to the addressables asset, the one that is like MyName.Level.MyTestLevel. You may also edit the “mapLocationIndex to something in a range of 1 to 95. This changes where the map will appear on the map board.
Once complete, your level should be ready!
Loading the Level
Now that you’ve got your mod exported, if you go in to your new mod folder, you should see something like this:

Now, you can load your mod as normal. You will not need to enable it via the mod manager, as it is already installed through your local files. However, you can disable it through the mod manager. Once you load in to the game, you will be able to see your map located on the map board (in Sandbox mode). You can click on it and enter. Additionally, you can press F8, and type loadlevel MyTestLevel where MyTestLevel is the unique ID you put in the json, and it will load straight to that level.
Congratulations, you have now made a map!
Final Adjustments
Now your map is done, you can explore with available settings.
For more information on gamemodes and modules, check out the Level JSON.
For more information on level components, check out Level Components.
For creating Dungeon areas, check out Area Guides.
For adding survival support, check out Survival Guide.
For adding dynamic music to your level, check out DynamicMusic.
Having troubles with your map? Check out the LevelFAQ, or ask in the #modding-help channels in the Official Discord Server