LitMoss
ASshader - LitMoss is the shader we use for everything in Blade and Sorcery. This is located in ThunderRoad > ASshader - LitMoss.
This shader covers a lot of artistic features, such as Vertex painting, moss, detail and packed detail maps.
This guide will also cover the MOES Texture Converter tool, as well as how to create MOES textures in Substance Painer.
Ocean Fog Caustics
These are modifiers that should not be changed. This is to ensure that ocean caustics are applied to the material. However, disabling these have never been tested, and therefore should not be changed.
Reveal Layers
Reveal is what causes blood to be applied on items and creatures. For this to apply, the item/part should have the Reveal Decal script applied. Read more on the Reveal page to find out how to correctly apply this.
Do not keep Reveal Layers enabled. Once your textures have been applied for reveal, untick the box.
SSS
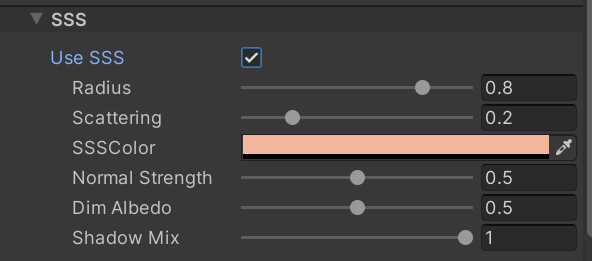
SSS, or Subsurface Scattering, is a shader component used in LitMoss for more unique details in materials that are able to utilise it, such as skin, wax and leaves.
This field allows you to adjust the colour, radius, scattering and other fields that you can properly adjust to get the realistic effect that you need.
For more information on what Subsurface Scattering is, see Subsurface Scattering Wiki.
Transparency
Transparent is quite expensive. If possible, try to avoid using transparency unless neccessary. This is more of the case on Android.
The transparency section of the LitMoss shader helps in letting your mesh have transparent materials. Similar to URP Lit, you are able to switch between Opaque and Transparent for its surface.
Opaque is a non-transparent material, and will not permit any transparent properties except if Alpha Clip is enabled.
Transparent will add transparency to the material, where the transparency node on the base-color can determine the transparency. You are able to switch which blend mode you prefer for the transparency. For more on transparency, see the Unity Documentation on Transparency.
Alpha Clipping allows certain parts of a texture to be transparent on the mesh. This can be configured on the texture to either have the alpha channel be used for alpha clipping, or for grayscale (black/white colors) to be used for clipping instead.
Opaque will change the render queue to 2000, while Transparent switches it to 3000. If you decide to use Aloha Clip with Opaque, this will change the render queue to 2450.
For the transparent/opaque nodes not described (Blend Op RBG, Source Blend RGB, Dest Blend RGB), it is best to avoid editing these fields, as they are more advanced features that may be hidden in a later update.
Colour Mask
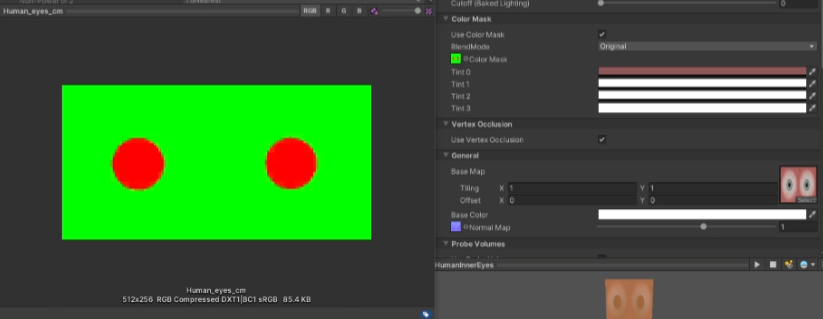
The colour mask allows you to mask colours on to different parts of the model, depending on if you have a mask texture. This allows you to be able to mask over, for example, a white piece of armour, to allow the armour to have different colouring without altering the basemap texture.
As an example here, the inner eye cornea has color mask enabled so we can change the color of the cornea.
Vertex Occlusion
This should never need to be ticked unless you plan to create an object or creature which utilises Vertex Occlusion for features like Manikin.
Vertex Occlusion is used for creatures, specifically used in Manikin, which allows the material to have specific vertices be culled depending on the armour equipped. For example, when wearing body armor, certain sections (such as the upper arm) and their vertices may be culled to prevent the skin from clipping through the armour.
For more information about Manikin and Custom Armor, check the Manikin Documentation.
Metallic (MOES/MOEDS/Moss ANSN)
There is a few options that are available when it comes to metallic features for LitMoss.
Moss Metal Mode
When enabled, it will force the Metallic map to be a MossMetal Mask instead. For weapons/props, you do not want this enabled, as it will break imbue.
MOES and MODS
Mode allows you to swap between MOES and MODs:
- MODS (Metallic, AO, Detail, Smoothness)
- MOES (Metallic, AO, Emission, Smoothness)
The order of MOES/MODS goes in order of RGBA for packed textures. You put your MOES/MODS map inside the Metallic Map field. Ensure that it is Mode 1 for weapons, so they accept weapon imbue.
For imbue to be supported, Use Emission does not need to be enabled. This is done at runtime, and will be overwritten when imbue is set on the weapon.
For a video guide on making a MOES texture in Substance Painter, see this Tutorial
Using the Moes Maker
The Moes Maker is a simple tool used to convert your textures in to a MOES map. It will combine a metallic, ambient occlusion, emission and smoothness in to one single packed texture. This conversion tool also supports Roughness maps.
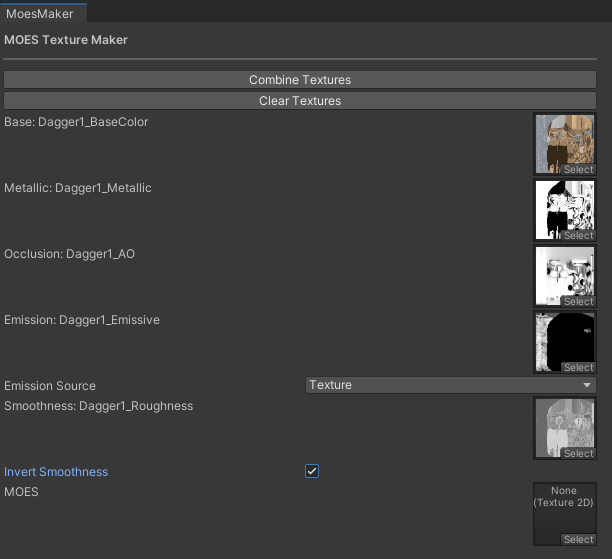
- Base Map : Put your colour map/BaseMap in to this field.
- Metallic : Put your metallic map or metallic smoothness map here
- Occlusion : Put your Ambient Occlusion/AO Map here
- Emission : Put your emission map here. If your emission map doesn’t exist/is not used, put the emission source to “Black” for it to not affect the material, white for it to affect all of the material, or texture if you do have an emission texture for the material.
- Smoothness: A smoothness texture doesn’t usually exist, it is usually embedded with the metallic texture. However, you can insert your roughness texture here, and tick “Invert Smoothness” if you do.
Once your textures have been submitted, press “Combine Textures” and it will create a MOES map for your material.

Once complete, you now insert this in to the “Metallic Map” field.
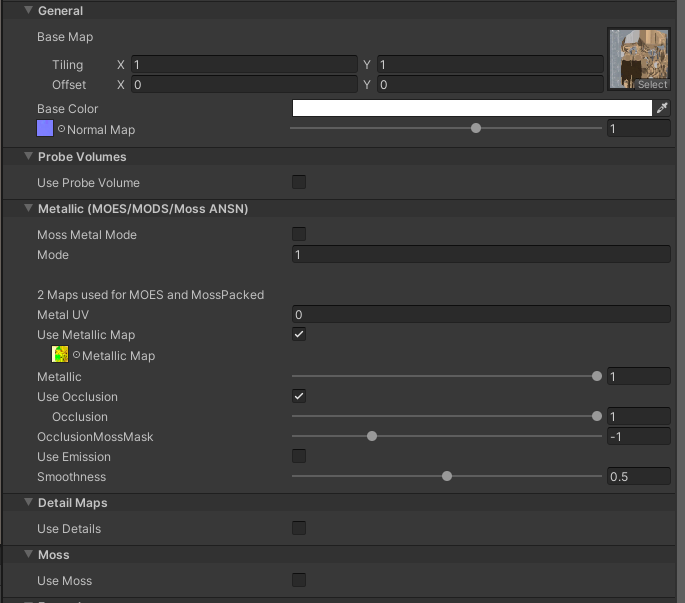
This is the fields that are set for weapons, and with these settings set, Imbue should work.
Detail Maps
Do not have detail maps enabled with no texture to apply. This will cause your prop to be very dark and look incorrect upclose.
Detail Maps are only recommended for static props in maps and should not be used for dynamic objects and creatures.
This field is separate from detail maps that are built in to MODS maps, and if used with MODS maps, will go over it.
The detail map section allows you to add a Detail Map Packed texture to add detail over your model.
Moss Maps
Do not have moss maps enabled with no texture to apply. This will cause your prop to be very dark and look incorrect upclose.
Moss is stripped and will not appear on the Android Platform.
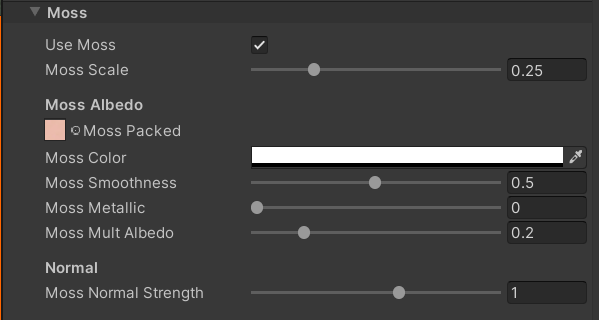
The moss section of the LitMoss shader allows you to add an extra layer over your material.
Moss can be applied either across the entire object, or it can be applied via Vertex Painting either on the model itself, or using Unity’s Polybrush Tool. For information on Vertex Painting and Polybrush, see Painting Colors on a Mesh.
In this example, the map “Sanctuary” has moss enabled for the floor, allowing masking for snow.
